
Before you install ASIO4ALL
Confirm that ASIO4ALL is the right driver for the device. If a professional audio interface manufacturer provides a current native ASIO driver, use that first because it normally exposes the hardware's full routing and monitoring features. ASIO4ALL is intended mainly for Windows WDM devices without a dependable native ASIO option.
Close the DAW and other programs using audio. Download only from the official source or a page, like this one, whose button resolves to that official file. At the time of verification, the expected version was 2.22, the filename was ASIO4ALL_2_22.exe, the release date was July 29, 2026, and the file size was 557,232 bytes.
Do not remove Realtek, USB Audio, or other Windows device drivers before setup. ASIO4ALL depends on those WDM endpoints. It is a connecting layer for ASIO applications, not a replacement for the underlying Windows hardware driver.
Check current release facts on the official ASIO4ALL download page.
Step-by-step ASIO4ALL installation
The setup wizard is brief. Older instructions may show an optional Offline Settings component or a Debug option. In 2.22, Offline Settings is always enabled and the Debug installer option has been removed, so do not assume a different screen means the current installer is incomplete.
Windows may show a User Account Control prompt because the installer changes driver-related system components. Verify the filename and source before approving it. This site does not claim that a file is safe merely because a button looks official; the source URL and expected file details are the useful checks.
- Download ASIO4ALL 2.22
Use the official-source link and allow the 15-second check to finish. Save the executable where you can find it.
- Open the executable
Run
ASIO4ALL_2_22.exeand verify that it is the file you intended to download. - Read and accept the setup terms
Proceed through the wizard. Avoid installers from sites that add download managers, browser offers, or unrelated driver tools.
- Finish installation
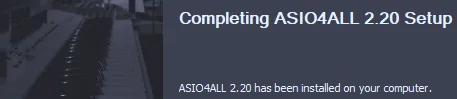
Let setup complete. Offline Settings is installed automatically in version 2.22.
- Reopen your DAW
Start the host again so its audio driver list refreshes, then select ASIO4ALL v2.
Select ASIO4ALL in your DAW
Installation alone does not switch every program to ASIO4ALL. Open the application's audio preferences and find its driver type or audio system menu. Choose ASIO, then select ASIO4ALL v2 as the device. Exact labels vary among FL Studio, Reaper, Ableton Live, Cubase, and other hosts.
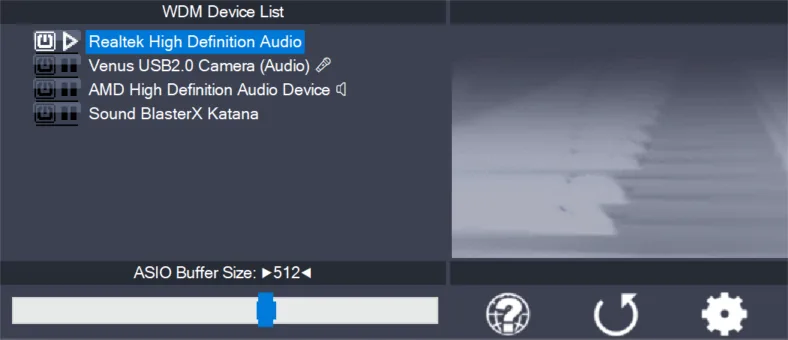
Open the ASIO4ALL control panel from the host. Enable the input and output required for the current session. Begin with one output and, if recording, one input. Selecting every endpoint can combine devices with different clocks and formats, which makes initial troubleshooting harder.
Set a moderate buffer such as 256 samples and play a simple project. If playback is clean, lower the buffer when live monitoring needs less delay. If there are clicks or gaps, raise it. For mixing, a larger buffer is normally acceptable because real-time input monitoring is less important.
What to do when installation does not work
If ASIO4ALL is absent from the DAW, close and reopen the host. Confirm that the application supports ASIO and that you are looking in its ASIO driver list rather than ordinary Windows output devices. Reinstall from the official file if the setup may have been interrupted.
If the driver loads but no endpoint works, close browsers, communication software, media players, and a second DAW. Open advanced view only after simple view fails to expose the needed device. Match the project's sample rate to the endpoint and raise the buffer during diagnosis.
A restart is a fallback rather than the first step. Reboot Windows when the driver remains unavailable after reopening the DAW, when a device appears locked despite closing applications, or when Windows has pending audio-device changes.
| Symptom | Likely cause | First fix |
|---|---|---|
| ASIO4ALL missing | Host did not refresh or does not support ASIO | Reopen the host and check its ASIO settings. |
| Red device icon | Endpoint unavailable or already in use | Close other audio apps and re-enable the endpoint. |
| Clicks and gaps | Buffer too small or device clocks conflict | Raise the buffer and disable unused devices. |
| No microphone | Wrong input or permissions | Enable the correct endpoint and check Windows microphone access. |
| Audio is delayed | Large buffer or Bluetooth transport | Use wired audio and reduce the buffer only while stable. |
Verify the driver after installing ASIO4ALL
After you install ASIO4ALL on Windows 11 or Windows 10, reopen the DAW before restarting the whole computer. The useful check is whether ASIO4ALL v2 appears in the host's ASIO list, the control panel opens, and one known output plays a simple project without a red status icon.
If the driver is missing, close other audio applications and reopen the host once more. Keep the underlying Windows audio driver installed; ASIO4ALL uses those WDM endpoints rather than replacing the Realtek, USB Audio, or interface driver.
How to install ASIO4ALL verification checklist
The final part of learning how to install ASIO4ALL is proving that the new driver is available to a real ASIO host. Reopen the DAW after setup, visit its audio preferences, and choose ASIO4ALL v2. Open the control panel from inside that host and enable one known output. If the driver name is absent, confirm that the application supports ASIO before reinstalling anything.
Use the how to install ASIO4ALL verification checklist with a simple project: play a test signal, record a short input when applicable, close the host, and open it again. The selection should persist and the endpoint should return without a red unavailable icon. A Windows restart is only the next step when reopening the host does not register the driver. This test also reveals whether another audio application is taking exclusive control.
Do not judge installation success by the presence of a desktop panel alone. Offline Settings can show devices, but the meaningful result is stable streaming inside the program where you will record or produce. Once playback and recording work, note the current buffer and sample rate before optimizing latency.
- Expected driver name: ASIO4ALL v2.
- Expected installer name:
ASIO4ALL_2_22.exe. - Expected first test: one input, one output, and a moderate buffer.
ASIO4ALL installation FAQ
Do I need to restart after installing ASIO4ALL?
Usually not. Reopen the DAW first. Restart Windows only if the driver remains missing or the audio endpoint stays locked.
Where does ASIO4ALL appear after installation?
It appears as ASIO4ALL v2 in the ASIO driver or audio device list of compatible music software. It is not normally selected from the taskbar speaker menu.
Should I uninstall my current sound driver?
No. ASIO4ALL uses the existing Windows WDM device driver underneath, so keep the Realtek, USB Audio, or manufacturer device driver installed.
Why is Offline Settings missing from the installer options?
In ASIO4ALL 2.22, Offline Settings is always enabled and its optional component selection was removed.
Can I install ASIO4ALL without administrator access?
Driver installation normally requires sufficient Windows permissions. Do not bypass organizational policies on a managed computer; ask the administrator instead.
How do I install ASIO4ALL on Windows 11?
Use the verified ASIO4ALL 2.22 installer, finish the setup, reopen an ASIO-compatible DAW, select ASIO4ALL v2, and enable one connected endpoint in the control panel. The same installer is used on Windows 10.
Get ASIO4ALL 2.22, then return to this guide for setup.
The official download opens after a 15-second source check.